Floor markers might not be the flashiest part of video production, but they’re a quiet hero when used right. They help actors or speakers hit their spots, keep movement smooth, and avoid drifting out of frame. That’s especially true in studio shoots where blocking is tight and repeat takes need to be consistent.
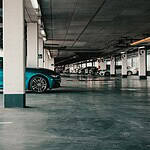
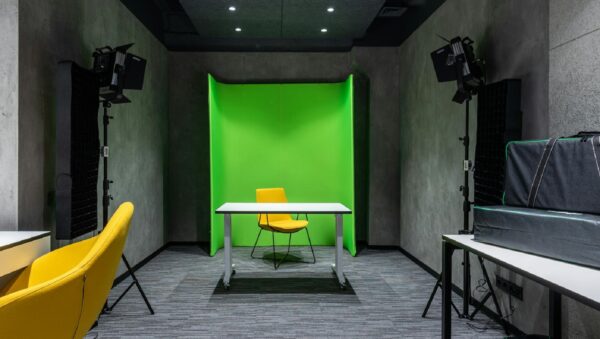
But here’s the thing. Inside a green screen setup, floor markers can go from helpful to harmful fast. What seems like a solid setup shot can end up looking messy when the green screen doesn’t key out cleanly or a marker reflects odd light. If you’re using a green screen studio rental in Cincinnati during the winter, this becomes even more of a challenge. Tight spaces, tricky indoor lighting, and extra cables from heaters or lighting gear can lead to mistakes you’d rather avoid. Knowing how to use floor markers without causing more post-production work makes your day smoother and your footage cleaner.
Choose the Right Type of Marker
Choosing the wrong marker can create problems before you even roll. What works on stage might not work on camera, especially in a green screen space.
1. Avoid anything shiny. Gaff tape is a common pick, but glossy varieties can bounce light back into the lens, and that glare gets messy fast.
2. Try low-profile discs or soft tape with a matte finish. These are less likely to reflect light and they stay in place better than anything with a plastic coating.
3. Skip neon or overly bright colors. These tend to stand out too much during keying, especially if the lighting shifts during takes.
4. Keep size in mind. If markers are too small, talent misses them. Too big, and they show up in the frame or worse, cast shadows.
We like working with toned-down grays or blues that don’t blend with skin tones or studio floors, but also won’t confuse the software during editing.
Where to Place Markers (Without Wrecking the Frame)
Almost every issue with markers in green screen footage comes down to bad placement. Even the right material can become a hassle if dropped in the wrong spot.
• Never plant a marker directly in front of a subject’s feet. It’s easy to land a shadow right on top of that space, which then messes up the background cleanup later.
• Avoid dropping markers near the edge of the screen. One small tilt of the camera and suddenly that marker sneaks into view, forcing retakes or patch work in post.
• Always lock in your main camera angle first before placing anything on the floor. What looked fine from eye level may not work once you review shot framing through the lens.
You want flow and visibility for your talent, not clutter on-camera. Aim for subtle positioning where the actor can still see the mark out of their peripheral vision, but nothing ends up in the shot or flagged by the editing software later.
Keeping Markers Out of Post-Production Headaches
Fixing a floor marker in post-production isn’t impossible, but it’s frustrating, especially in green screen work where even one color mismatch throws everything off. The best fix is avoiding the problem before it starts.
• Lighting changes everything. A marker that seemed neutral can suddenly glow when under full lights or if a softbox shifts direction mid-shoot.
• Unchecked markers show up in reflections or shadows, which won’t key out well and often take longer to correct than retaking a shot would have.
• If you’re in a green screen studio rental in Cincinnati, you’ve already got more control than a DIY space. But that only helps if you double-check every surface around your shoot before you roll.
Small steps like walking the green screen area after lighting is finalized, or checking split monitors during rehearsal takes, can flag problems before they become editing delays.
If you can get a second set of eyes on the set before shooting, a fresh perspective can help catch a marker that’s out of place or dangerously close to the frame. Sometimes, moving a marker by just an inch can save hours of editing work.
Tips for Winter Shoots in Tight Studio Spaces
Studio setups in winter have their own set of rules, especially when you factor in heaters, layers of clothing, and slick floors. Marker issues become harder to spot when your focus is split keeping people warm and gear from fogging up.
• Watch for condensation underfoot. Floors can get slick fast when cold air touches warm studio heat, making it easy for certain types of tape markers to peel or slide.
• Heated floors or nearby vents can affect tape glue. A marker that looked stuck might lift at the edges after just a few minutes.
• Tape can bunch or curl if the floor isn’t perfectly flat. Always press down firmly and recheck between takes.
• Keep marker zones clear. Winter sessions often create clutter, coats, boots, spare lighting grip, and these things can slide into the frame or overtop markers if you’re not careful.
We’ve found that checking marker placement every couple of takes becomes more important in winter. Floor conditions shift slightly underfoot and can change how safe or visible a spot really is.
If anything in the studio changes temperature or humidity over the day, tape may start to move or curl, so keeping a spare roll nearby is a smart backup plan. A setup that looks fine at call time may need a quick touch up partway through.
Focus on the Finish: Get the Shot Without Regrets
Poor marker setup creates waste, wasted takes, wasted edits, and most often, wasted time. When you build in a few minutes to place and check markers properly, the payoff is a smoother shoot and less stress during the final cut.
Green screen visuals only work when everything else stays clean and simple. Floor markers are part of that. What feels like a small tool ends up shaping blocking, visual cues, and how many hours you’ll spend getting rid of something that didn’t belong in the shot to begin with.
Smart planning, good material picks, and thoughtful placement go a long way. Most of the cleanest shoots we’ve seen didn’t happen because of expensive gear, but because the basics were respected, including the simple floor marker.
Taking the time to coordinate with your entire team on floor marker placement ensures everyone knows where the marks are and can avoid accidentally moving or covering them while resetting between takes. Communication helps prevent unnecessary confusion, especially when the studio gets busy.
Planning a studio session comes with its own set of challenges, especially when winter conditions are in play. Our experienced team is here to support you every step of the way, from choosing the right markers to optimizing your setup for seamless post-production. For a streamlined experience and a comfortable environment, our green screen studio rental in Cincinnati is designed to keep your project on track. Contact Killerspots Agency today at 513-270-2500 to get started.